How to Create Multiple Stylish CSS Button
2 min read
Stylish CSS Buttons
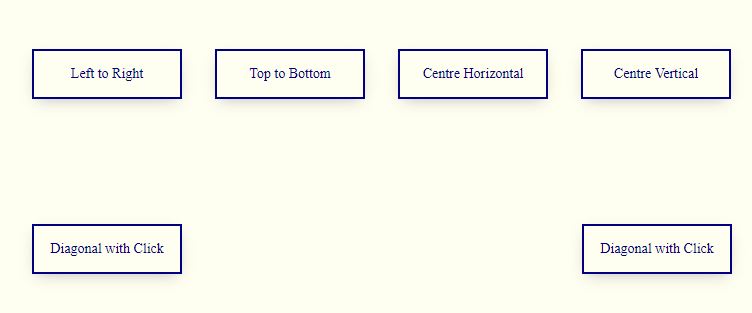
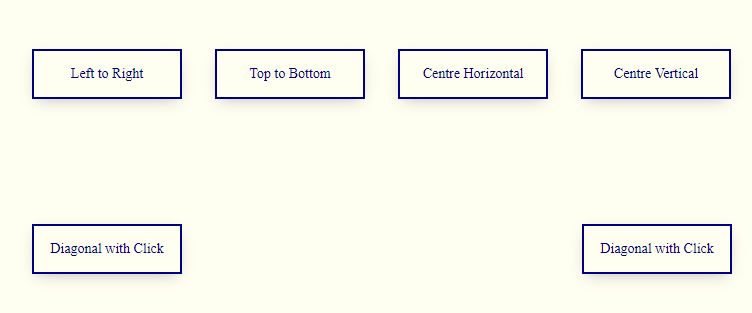
Here we will understand the following points on How to Create Multiple Stylish CSS Buttons using CSS3 and HTML
1. How to change Button Background from Left to Right on Mouseover
2- How to change Button Background from Top to Bottom on Mouseover
3. How to change Button Background from Centre Horizontal on Mouseover
4. How to change Button Background from Centre Vertical on Mouseover
5. How to change Button Background as Diagonal on Mouseover
6. How to change Button Background as Diagonal on Mouseover
HTML Source Code:How to Create Multiple Stylish CSS Button
<!DOCTYPE html>
<html lang="en" >
<head>
  <meta charset="UTF-8">
  <title>Stylish Button Hover Effects</title>

  <link rel="stylesheet" href="./style.css">

</head>
<body>
<!-- partial:index.partial.html -->
<body>
  <div class="stylish-button-container">
    <div class="stylish-button-container-card">
      <button class="stylish-button button--one">Left to Right</button>
      <button class="stylish-button button--two">Top to Bottom</button>
      <button class="stylish-button button--three">Centre Horizontal</button>
      <button class="stylish-button button--four">Centre Vertical</button>
      <button class="stylish-button button--five">Diagonal with Click</button>
      <button class="stylish-button button--six">
       Diagonal with Click
      </button>
    </div>
  </div>
</body>
<!-- partial -->

</body>
</html>
CSS Source Code:How to Create Multiple Stylish CSS Button
:root {
  --primary: #000080;
}


.stylish-button-container {
  align-items: center;
  display: flex;
  height: 100vh;
  justify-content: center;
}

.stylish-button-container-card {
  align-items: center;
  background-color:#FFFFF0;
  border-radius: 20px;
  box-shadow: 3px 3px 2px 2px #ccc;
  display: flex;
  flex-wrap: wrap;
  height: 350px;
  justify-content: space-between;
  padding: 40px;
  width: 700px;
}

.stylish-button-container-card
	 .stylish-button {
  background: none;
  border: solid 2px var(--primary);
  box-shadow: 0 5px 15px -5px #bbb;
  color: var(--primary);
  cursor: pointer;
  font-family: roboto;
  font-size: 14px;
  height: 50px;
  overflow: hidden;
  padding: 5px;
  position: relative;
  transform: perspective(
    1px
  ); /* Important to include perspective - gives the button depth */
  transition: color 0.2s ease-out;
  width: 150px;
}

.stylish-button::before {
  content: "";
  position: absolute;
  z-index: -1;
  top: 0;
  left: 0;
  right: 0;
  bottom: 0;
  background: var(--primary);
  transition: transform 0.3s ease-out;
}


.button--six .button__icon {
  transform: scale(0.8);
  transition: transform 0.2s ease-out;
}

/* Button Specific Styles */

.button--one::before {
  transform-origin: 0 0;
  transform: scaleX(0);
}

.button--two::before {
  transform-origin: 0 0;
  transform: scaleY(0);
}

.button--three::before {
  transform: scaleX(0);
}

.button--four::before {
  transform: scaleY(0);
}

.button--five::before {
  left: 50%;
  top: 50%;
  transform: translate(-50%, -50%) rotate(135deg) scaleY(0);
  width: 100%;
}

.button--six::before {
  left: 50%;
  top: 50%;
  transform: translate(-50%, -50%) rotate(45deg) scaleY(0);
  width: 125%;
}

/* Hover Styles */

.stylish-button:hover {
  color: #fff;
}

.button--one:hover::before {
  transform: scaleX(1);
}

.button--two:hover::before {
  transform: scaleY(1);
}

.button--three:hover::before {
  transform: scaleX(1);
}

.button--four:hover::before {
  transform: scaleY(1);
}

.button--five:hover::before {
  transform: translate(-50%, -50%) rotate(135deg) scaleY(4);
}

.button--five:active::before {
  transform: translate(-50%, -50%) rotate(135deg) scaleY(10);
}

.button--six:hover::before {
  transform: translate(-50%, -50%) rotate(45deg) scaleY(2.5);
}

.button--six:hover .button__icon {
  transform: scale(1);
}
Result How to Create Multiple Stylish CSS Button
Stylish Button Hover Effects
Download Source Code


Hallo mein Freund! Ich möchte sagen, dass dieser Artikel großartig ist, schön geschrieben und fast alle wichtigen Infos enthält. Ich würde gerne mehr Beiträge wie diesen sehen. Vivyanne Lonnie Grissel
You are my breathing in, I possess few web logs and infrequently run out from to brand.